Thursday, December 23, 2010

Concentrating light

Focussing light in a studio is interesting, to see how one can manipulate the light, to give an effect to what you want . From back, front, and under lighting. I miss my Bowens Mono lite with the barn doors. However , a trip to the art shop. You can get most metals to govern your creativity. From black plastic sheets to diffusing sheets. Or the builders DIY .

Here I simply for the exercise, took a sheet of black plastic . A4. Rolled it around my flash, using off flash . This can be done wirelessly, or by darkening the room using the bulb setting and firing the flash manually, or using energy saving bulbs or even to day bright LED lighting. Leds are  bright and cool.

But with out going through crazy expense. Unless you going to be doing allot of studio work. This method is simple, and costs less then £2 .


 I have a Tip Im putting on U tube. How to get the flash to set the off flash without the flash on the camera filling in the light, Well it could be re directed , But then you still have stray light. The Answer came to me when I put my finger over the flash and found it still fired the external wireless flash unit. ( read your flash Guide book for settings!)

Make a little hood from brown Parcel tape .  About 4 layers will do,  Just rap it round your fingers, if you wish. This brown tone still admits the wave length that sets of the other flash. Place it over the pop up flash on your camera, and off you go.  Without spilling light all over your subject. Giving you full control . You may have to adjust the head angle so the computer of the flash picks up the unseen wave length. 


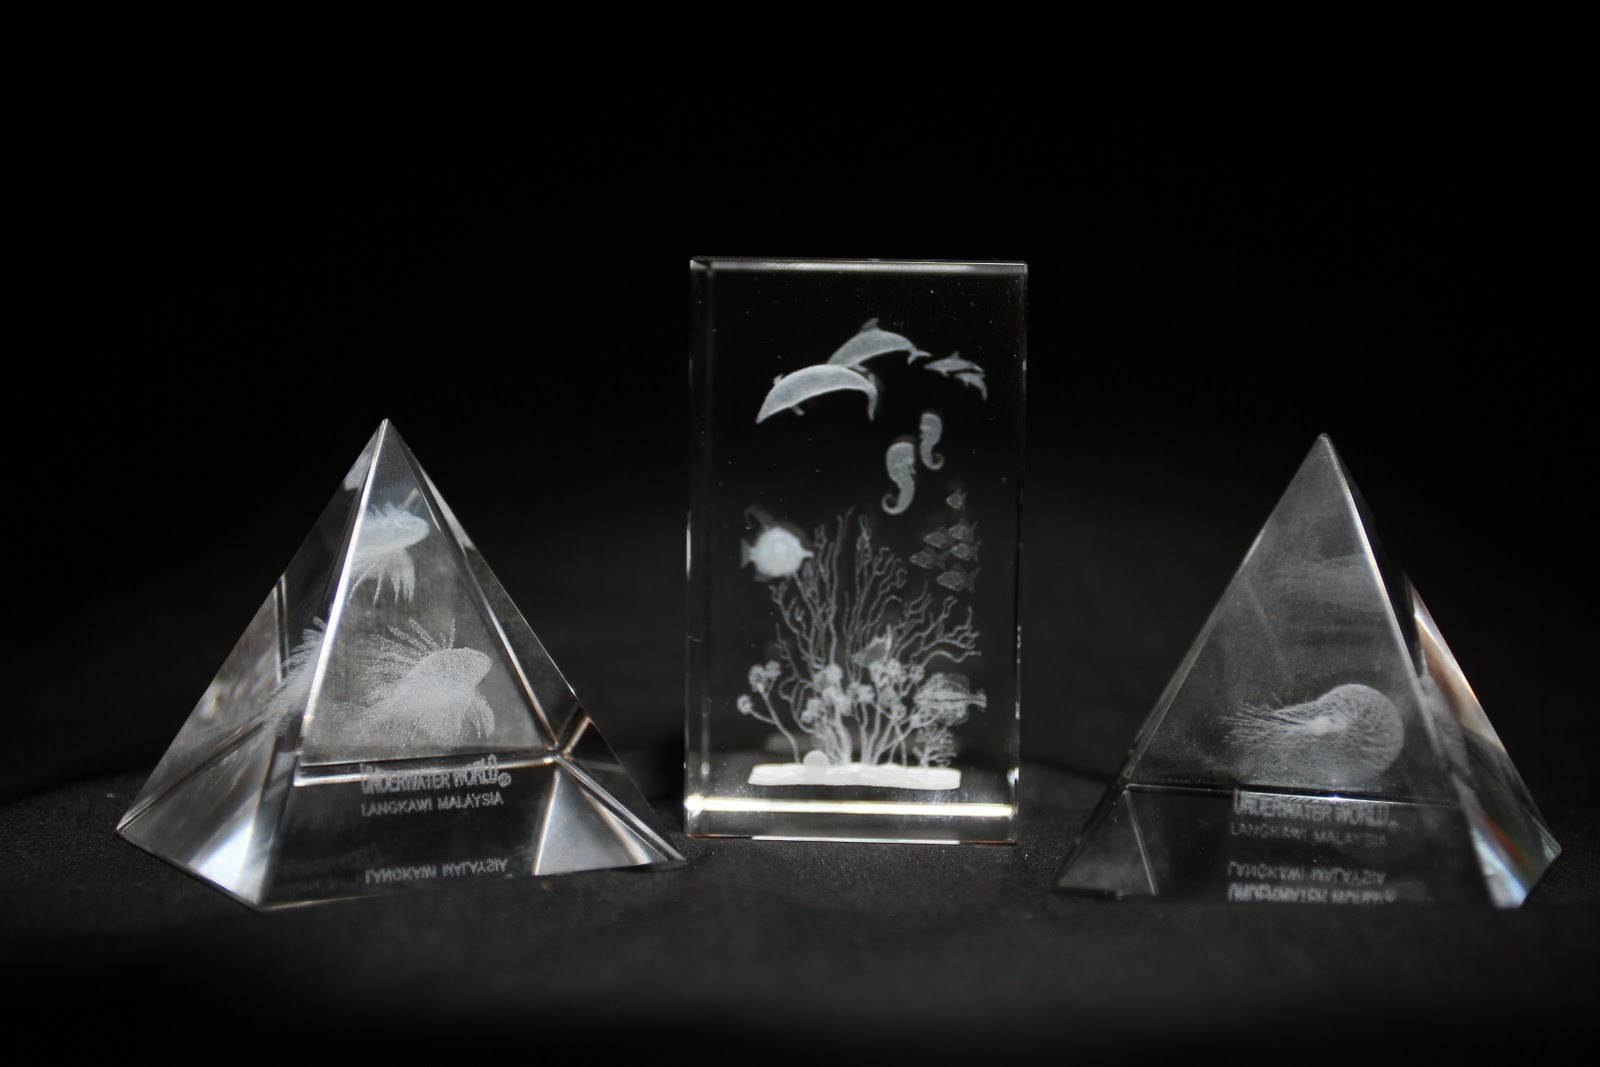
Here are some samples with flash . A modelling light or lamp as mentioned above has more control to see the end effect. 
I moved the slave flash as would with the lamp in the exercise with the angle of light !


Over head to the front 
Directly over head 

 Side lit left 

 Slightly to the left over head 


 Overhead high above 
 Overhead slightly to the back 
 Overhead Closer to subject 

These are also good subjects for my next Exercise Reflections. 

Sunday, December 19, 2010

Contrast and shadow fill.

Photographing an object as with a still life. Using a modelling light, eg Flash or tungsten- key light
And the use of a silver reflector at different distances, to show the how the shadows can be filled.
11 photographs:
The camera and lights are set at right angles from each other . The camera at same level as the subject, and the light shining from one side .
First photo taken as.

1 / without diffuser
2 / With
3 / with white card reflector on opposite side of lamp 3ft away
4 / the same with card 1.5 ft away
5 / this time using the same size reflector, using dull side of tin foil

. A Simple exercise gone bad. I was using a 283 Vivtiar flask on M f16 mains powered. As tungsten lamps are hard to find here in borneo at a reasonable price.
After 3 shots it packed up.
So I charged up the Metz . Again . to use for this exercise, Auto mode or set to F stops does not work, due to the computer adjusting the light. So on Manual, the batteries drained to fast.
Frustration ! Only my Landlords Blue lamp.  trying to set this up with there energy saving bulb was getting to much. Then SMASH on the floor it went !

So now faced with no lamp, no strobes, have to wait for the shops to open to buy a replacement, and some sort of lighting to do still life table top photography.

11 photographs: It does not explain what other photographs are required to make up the 11? Or does it say continue to use the diffuser over the Key light.

The following picture were re done. The next morning using a metz C45 Set to M giving an exposure setting F stop of F18 . Camera and flash settings did not change through out the shoot. 

Would I be right to do this:

6 / Same tin foil dull side 1.5 ft closer
7 / Same tin foil using bright shiny side 3ft
8 / Same this time 1.5 ft 
9 / Same using crumpled flattened tin foil 3ft shiny side 
10 / Same as 9 but 1.5 ft closer. 
11 / ????   I think take with diffuser and as 10

1
 2
 3
 4
 5
 6
 7
 8
 9
 10
 11

Clearly showing the dramatic change in shadow and contrast , When using a diffuser and a reflector makes highlights softer showing detail. Shadows show detail also. Yet the picture still holds texture and form.
picture 2 and 11 are the best here.

Saturday, December 11, 2010

The Lighting Angle

Set up as in the previous exercise , this time using a lamp with ES bulb through an umbrella .for the Key light.  subject Indonesian Mask 
I had difficulty getting the silhouette due to the back drop and diffuser size , so I had to place a large white flat diffuser in front of the lamp. 

Same exposure throughout. 

1. Lit front by the side, level with the camera 


 2 lit from the right side of subject.

3 lit right side, just little behind  

4,  trouble with the reflector,  diffuser
I found by either spilling light of the back ground or by in this case using a large nylon diffuser lit from behind. 

4 A   lit directly behind with a large diffuser. In doing this exercise. I discovered by not having a much larger diffused light. Back lighting causes allot of flare. 

 5 lit 45 Degrees front 

 lit 45 degrees from the right top , used a key light in studio Vembrant lighting.

 Lit over head and right back. 

 over head to the right 

 Lit over head.

 Lit from top slightly to the back.

 Top frontally lit 

The lighting I like,  is just using the key light at the full frontal, and 45 degrees top, and lastly the last top front .

Friday, December 10, 2010

Softening The Light

2 photographs

Table top photography:  Japanese fisherman.

using Flash, over head lit, with Vivtar 283 camera 400D lens 22.135 ISO 400 M


Result on the above is harsh shadow and bleached hight lights 

Same set up as above . This time the flash was bounced off a white umbrella . 


Resulting in a much better picture over all. with soft lighting hardly any shadow. More detail in the lighter areas .

Tuesday, December 7, 2010

Out doors at night

10 to 12 photographs.

In Kotakinabalu the building are not well lit nor are they high. So I did my best with what is here in the city.

Flood lit The Mosque :              
 Try Pod 

2 sec F 4 iso 800

1 sec F 4 ISO 800


Hand held 


hand held camera 

1/60th f5.6 ISO 800
hand held 


1/50th f5  iso 800          
Hand held 


Hand held 

1/30 sec  F4 
1/40th 4.5 


Hand held 


Try Pod used 
F22 1.3sec 100 ISO

F22 13 sec 100 ISO 
F9 2 sec ISO 100 
F 18 30 ISO 100


f16  15 sec  ISO 100 


Followers